docs
Aseprite Extension Installation Instructions
Aseprite Extension Installation Instructions
Get Aseprite
Make sure you have the latest Aseprite (minimum version is v1.3.7). The trial version does not allow plugins.
Aseprite is open source, but it is not allowed to be redistributed. There are multiple ways to get it. You can, for example:
- Buy it to support the developers
- Use a helper to build it locally (Windows)
- Build it with Docker (Linux)
Download the extension
After subscribing or signing up for the free trial, there will be a button to download the PixelLab extension from your account page.
Install the extension
You should be able to double click the downloaded file to install it. If you can't, you can also install it manually.
First, open Aseprite. From the menu bar, go to,
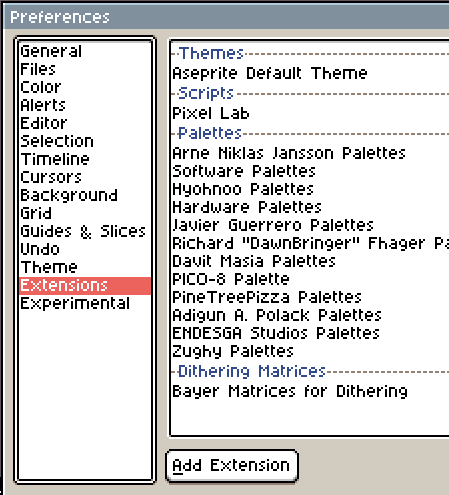
Edit > Preferences
Choose extensions in the list to the left, then click on "Add Extension" and locate the file that you downloaded in the first step.

Allow file and internet access
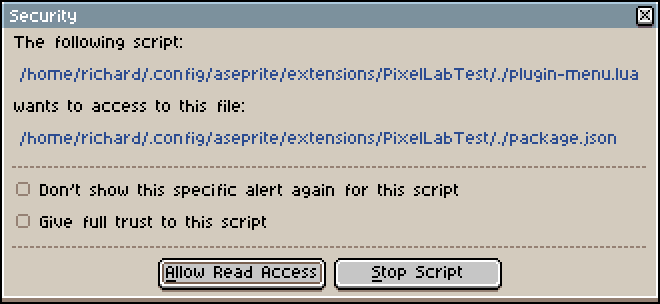
After finishing the steps above restart Aseprite and you should be prompted to give the plugin access to a file called package.json and internet access via websockets.
The plugin requires access to these and if you want the auto-update function to work you also need to give the plugin "full trust" so that it can overwrite itself in the future.


Finish the installation
You should now see a new window, the PixelLab menu. If you don't see the window or if you accidentally closed it, you can open it from the menu bar,
Edit > PixelLab > Open plugin
or by pressing,
ctrl + space + p.